Deciding how to size a solar installation can be one of those design issues that takes more time than expected. If you have a specific offset in mind, it can involve seemingly endless tweaking to your design to get the exact right production.
This means added time to your design process, for sure. But it can also mean that the system won’t meet customer expectations or be as efficient as it could be.
What if you could accurately size a system with just a few clicks, in just a few seconds?

Why sizing a system correctly is important
An incorrectly sized system may not produce the amount of energy the homeowner was expecting, leading to unhappy customers and/or unprofitable systems. For example, customers that were expecting to cover their entire electric bill, and maybe even sell some energy back to the power company through NEM, will be pretty disappointed if they consistently receive bills after panels are installed. On the other hand, a system that is too large will generate excess energy, making the solar array less financially attractive for the homeowner.
But, sizing the system correctly isn’t the only consideration: You have to get the production you want in the most efficient way possible.
When you’re tweaking a design to try to meet a certain production number, you might not add and remove panels in the most efficient way. So, a system could meet the target production, but might place panels in less-than-ideal locations and leave better (sunnier) areas of the roof bare.
How Aurora AutoDesigner helps
Aurora’s AutoDesigner tool can automatically generate the perfectly sized solar system based on your customer’s electricity use.
With just a few inputs from you, AutoDesigner creates the majority of the system — in a matter of seconds. And you can still modify the design to meet any other specifications a customer might have. This not only speeds up your workflows, but makes your designs more accurate and less prone to error.
How Aurora AutoDesigner works
Maybe the most difficult part of using AutoDesigner is finding it in your design.
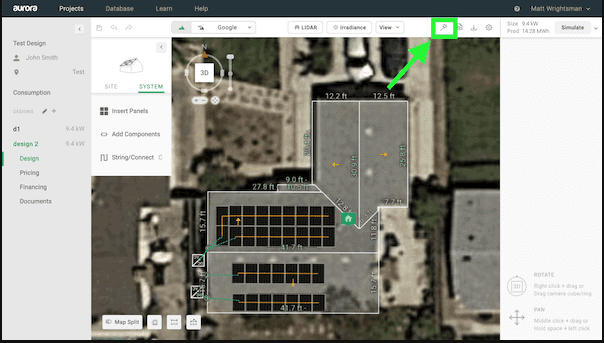
It’s the little magic wand in the upper right of the design screen. Once you click it, you’re just a few inputs away from a design.
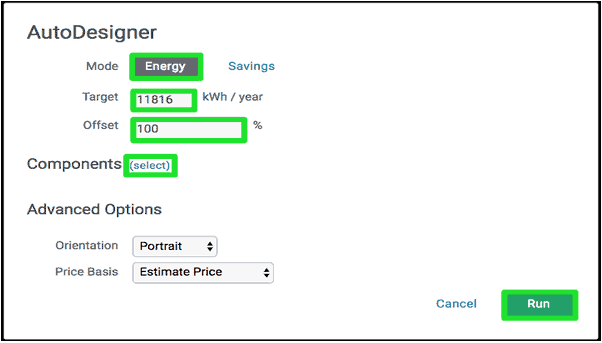
When you click the wand, it brings up the above screen. You simply select how you want to calculate production — in this example it’s “Energy”, but you could also choose “Savings”. Then enter your target kWh per year and the offset percentage, and select your components. Using the Advanced Options, you can also determine the orientation of the panels, and choose from pricing options.
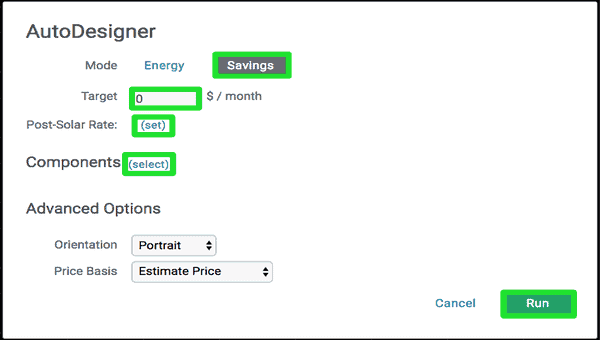
If you select “Savings” mode the choices are similar, but you enter a target of $ per month, and set the post-solar rate.
Aurora does the rest. Whether you use Energy or Savings mode, in a few seconds the customer’s roof is designed to meet those exact specifications. Check out our Help Center to learn more.
We’re taking next week off for Thanksgiving, but will be back in December with feature #6. In the meantime, check out our Aurora Top 10: All In One Place page to see all the other features highlighted in this series and look at the schedule for the remaining posts.
Do you have suggestions for an issue or feature you’d like to see covered? We’ll have some Aurora gifts for any ideas we use. Email us here.